In my second year at college back in 2021 over christmas a few friends and I thought it might be interesting to make a small 3D model of our classroom as something to do. Little did we know at the time this would be a four month project which we each put hundreds of hours into resulting in an extremely detailed and perfectly to scale model of our entire college.
The first step to this was to get measurements and create a sort of schematic of the building, this would prove to be very complicated as there were none online so I had to create designs of each room and then fit them all together. I began by using the distance tool on google maps to get a vague outline of the building as seen in figure one, this can be used as an initial reference to where things go.

Figure One: A simple outline of the building on google maps
We then followed this up by using our phones to make vague photo scans of our classroom and the corridor, however we ran immediately into a lot of issues where the scaling of everything didn't quite fit. This was solved by asking permission from our college tutor to go around the building getting measurements and references on a day off from college work. We were given a tour of the entire building including staff only areas like storage rooms where we took thousands of reference photos along with a vague photoscan of each room, whilst the others were doing these parts I would measure the room to create a sort of blueprint of it. This work can be seen in figures two and three.

Figure two: These are examples of some of the reference images that we gathered. As we were doing the building and everything in it we needed references of every object too.

Figure Three: Using the references and measurements I had gathered I was able to create these near perfectly accurate designs for each room and section of the building, these would then just need to be fitted into the overall size of the building and should in theory all just fit together as is shown in figure four.

Figure four: A complete map of the building which is perfectly to scale, this only includes the sections we were able to model and reference as some staff only areas were naturally off limits to us.
Once these references and measurements were gathered we created a large list of each model needed and began splitting the workflow to get them all done. We then worked through these and gradually pieced together the model room by room. I personally did a lot of work on finding product listings for items we needed for references like chairs, tables, computers, etc which is an extremely time consuming process. Using these references though we were able to make some extremely accurate models down to the computers having the exact same components as they did in real life as can be seen in figure five.
Figure Five: This image shows a render of the computer and its internal components, these perfectly match the computers in real life
We were then able to piece these models together to create the rooms and corridors and an early version of one of these can be seen in figure six

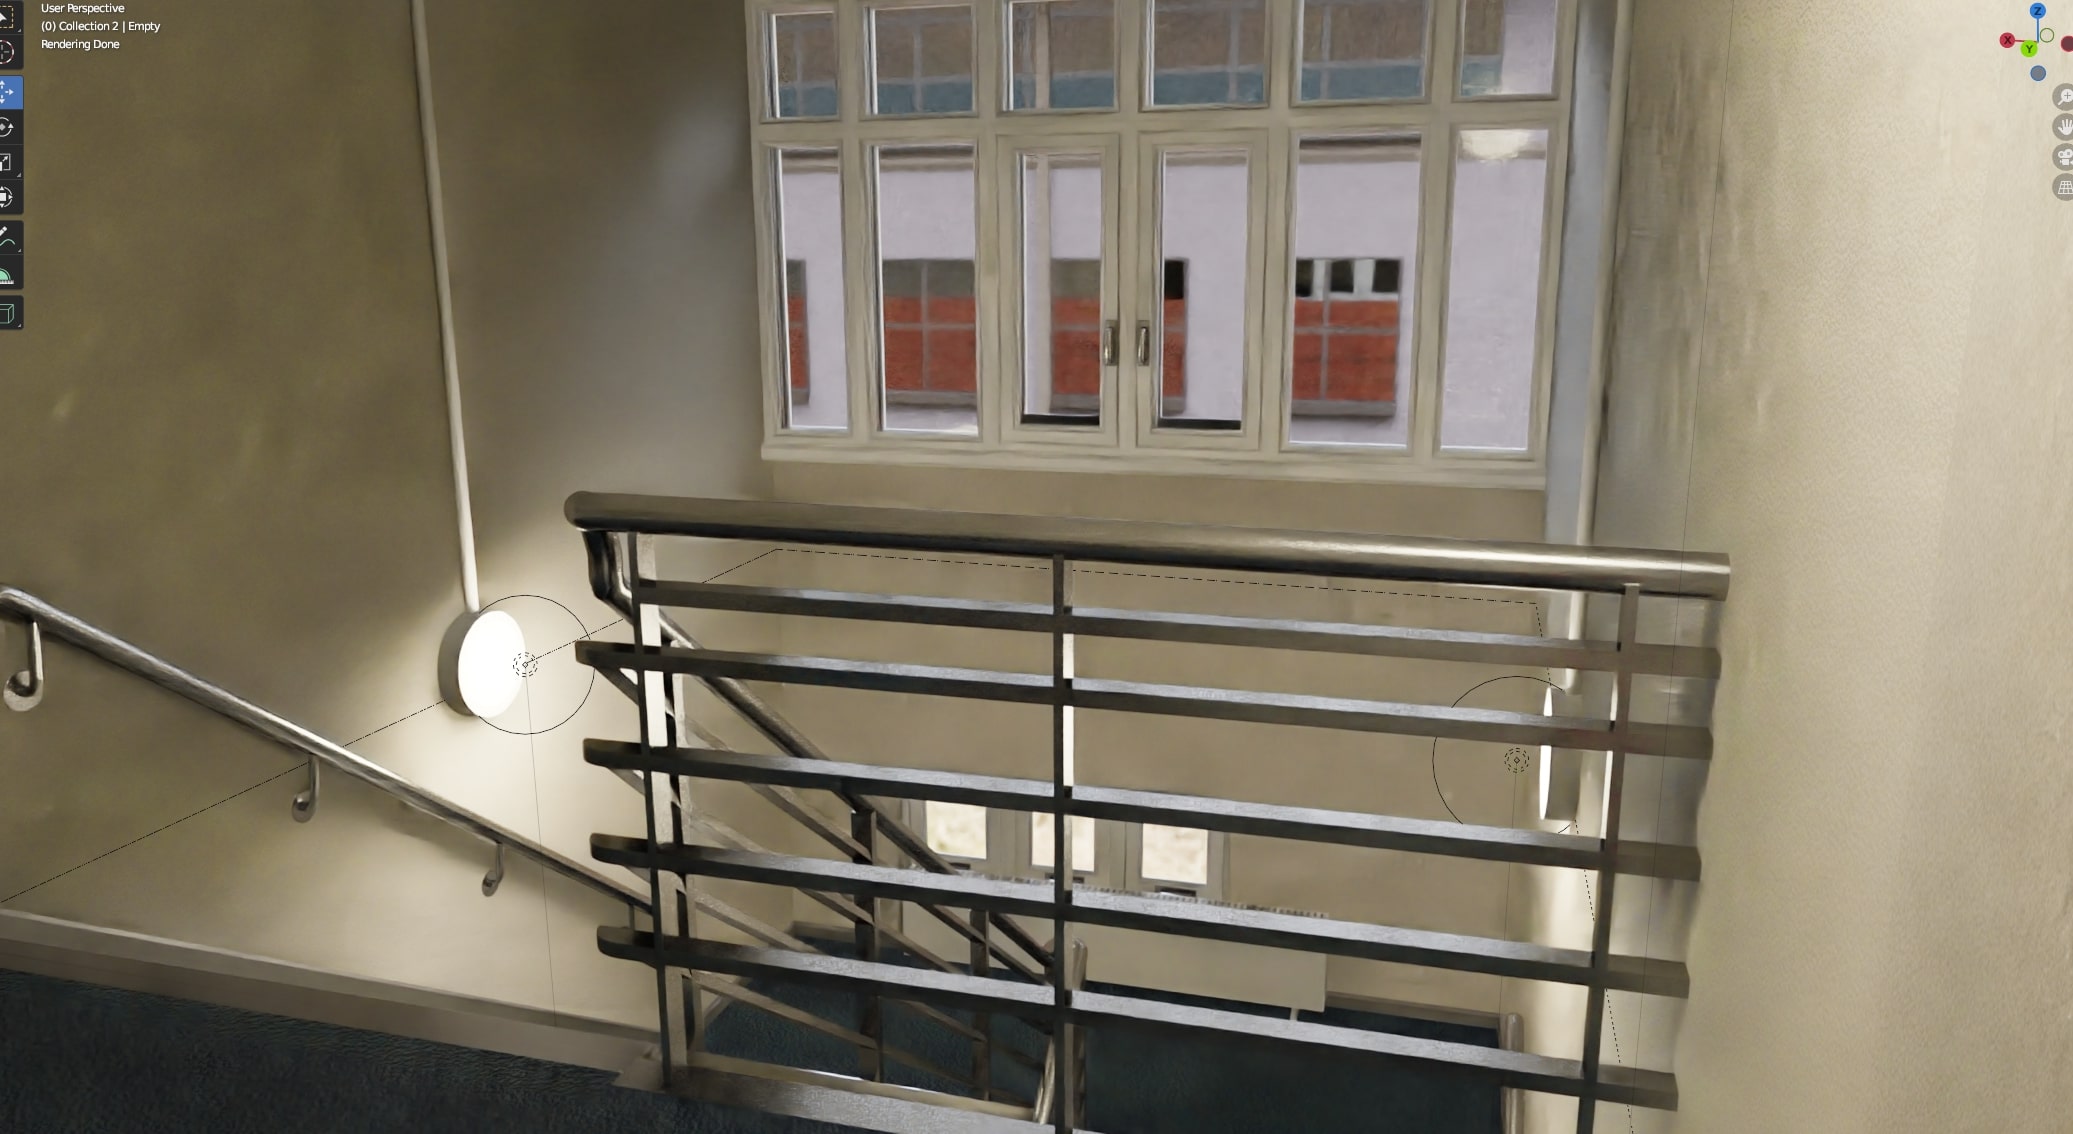
Figure Six: This is a screenshot in Blender of one of the corridors, this will become much more detailed with time however the model shown here is perfectly accurate in terms of sizing and design of a lot of the models in it
Once we got into a flow of making models and piecing everything together progress was quite fast with us starting to model the outside of the building and assemble complete detailed room models like in figures seven and eight. At this point we had yet to do any modeling of the actual outside areas like the car park as we knew these would be extremely technical.

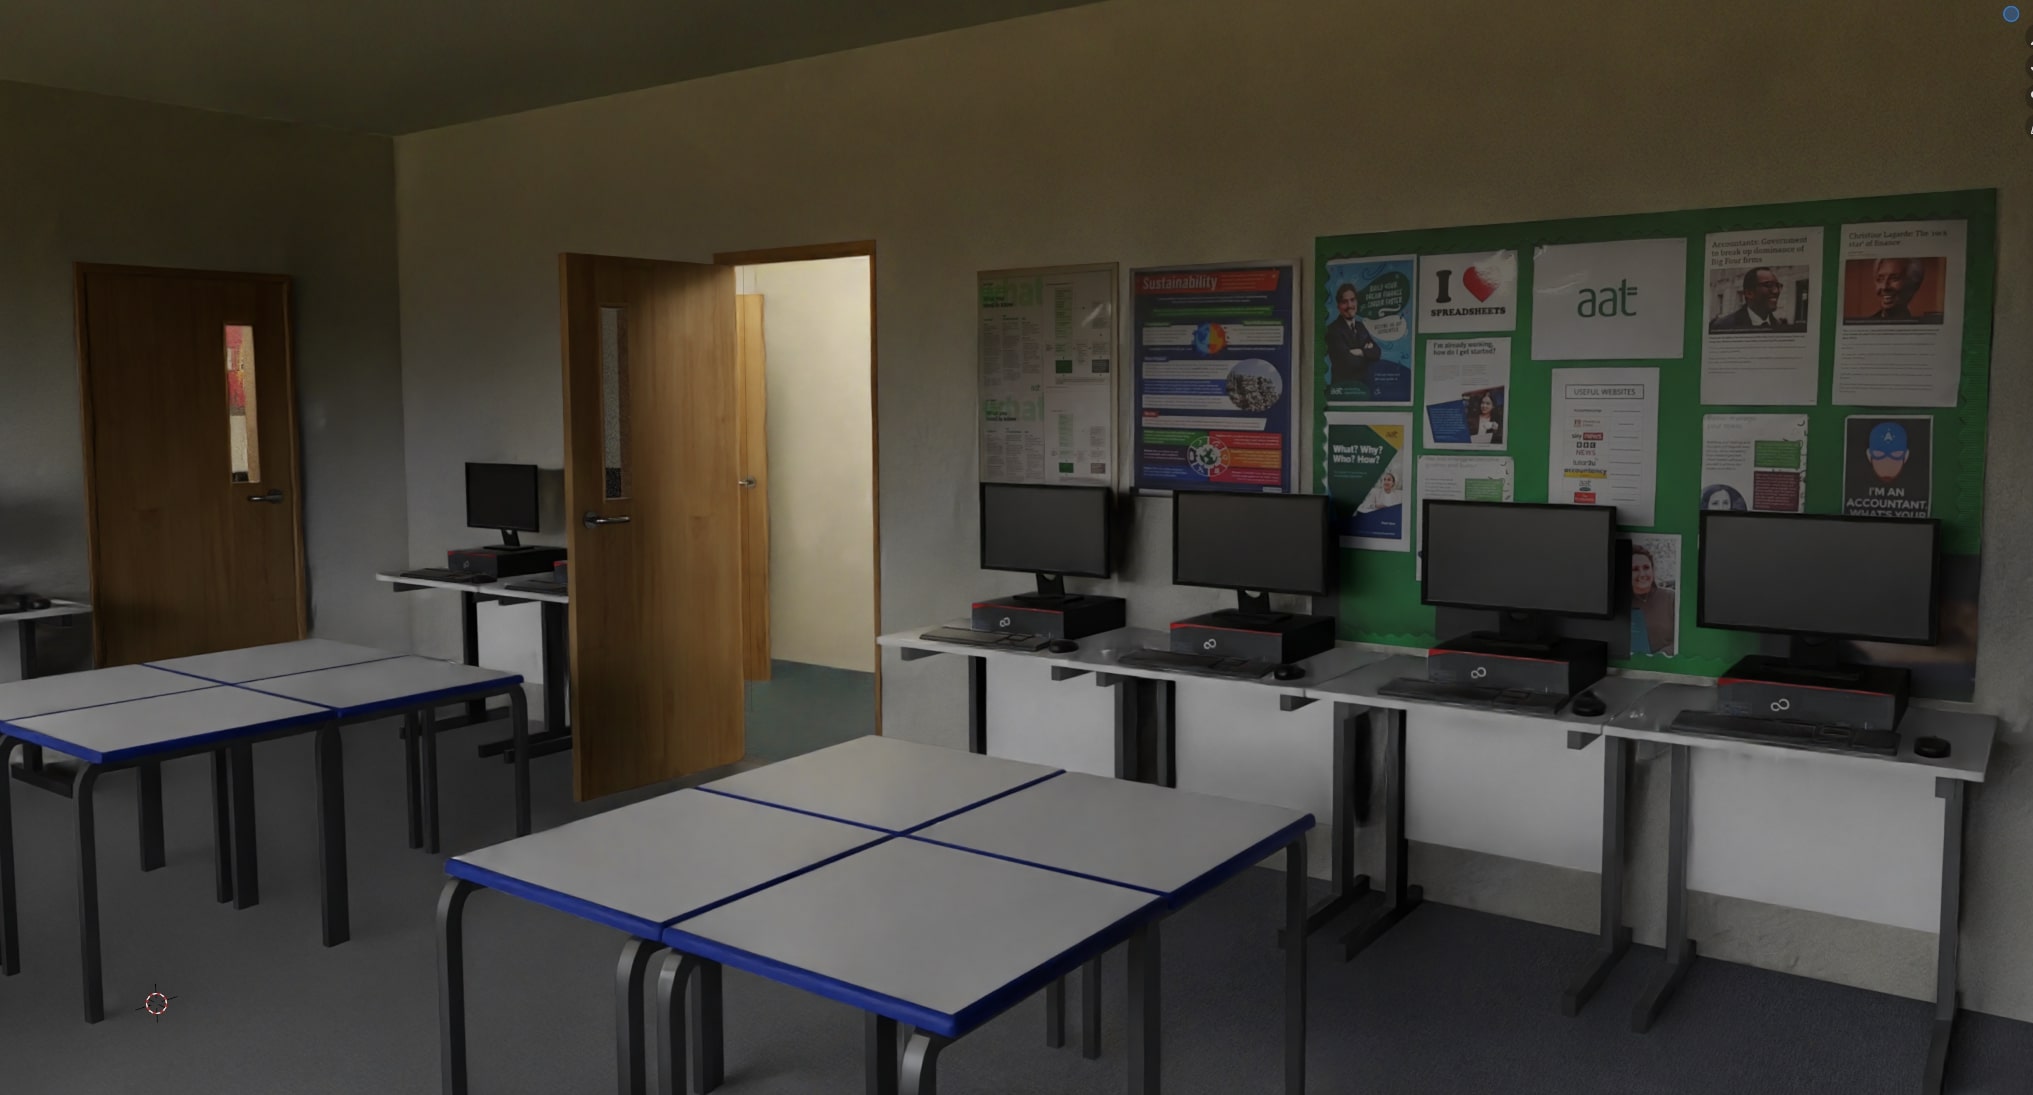
Figure Seven: This is a render of our classroom showing the layout and some of the general detail such as wallpapers on computers and a simulated bin lining.

Figure Eight: We managed to extract the 3d data from google maps of the building which we used as reference to scale the model to. You can see us starting to model details such as windows on the right side of the building.
As we were moving fast we begun working on the outside areas such as other buildings that can be seen in figure nine which were needed for scenery, it's worth noting at this point it was november so we were all in the middle of working on our final assignments for our grades

Figure Nine: A simplistic but realistic model of Grove House. This building has no modeled interior but is detailed enough it can be difficult to distinguish from the real thing when in a completed scene.
Motivation dipped for a few weeks as we got distracted by other projects and a new computer was built for once of the team but it soon picked back up again and in mid december there was almost starting to be an end in sight. We had a perfectly scaled model of the entire building along with references and the beginnings for the outside too such as the road layout and car park in figure ten

Figure Ten: In this image you can see the current state of the building which is now fairly accurate but missing some large sections. We also have more google maps terrain which we have been using as reference to create designs of the road layout and car park.
I took over from my friend on modeling the outside at this point and created all of the roads and their markings. This and the terrain were extremely complicated and time consuming to make as we had to get all of the elevation correct which is really difficult with next to no references. At this point we started some test renders to confirm the realism of the building, a series of these can be seen in figures eleven to fifteen.
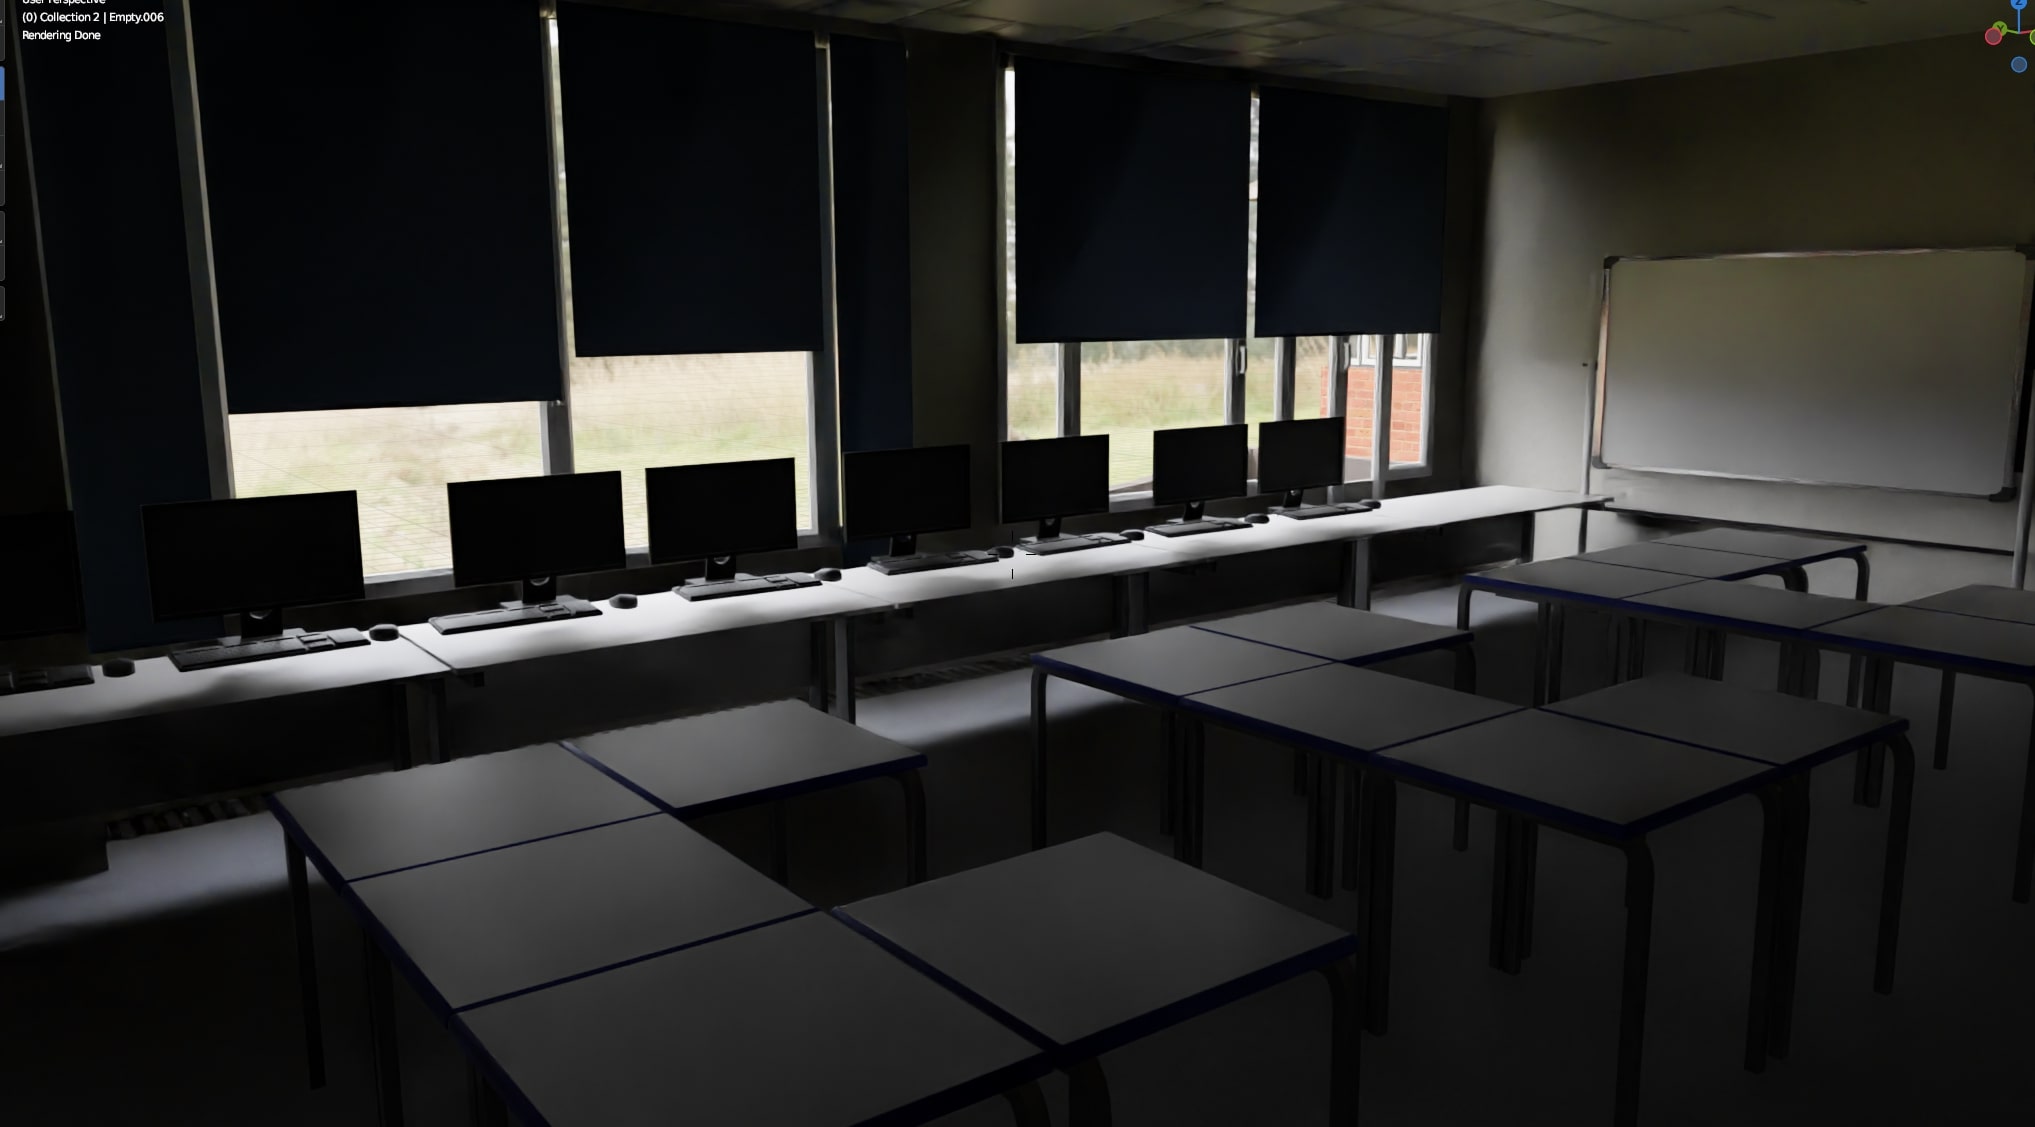
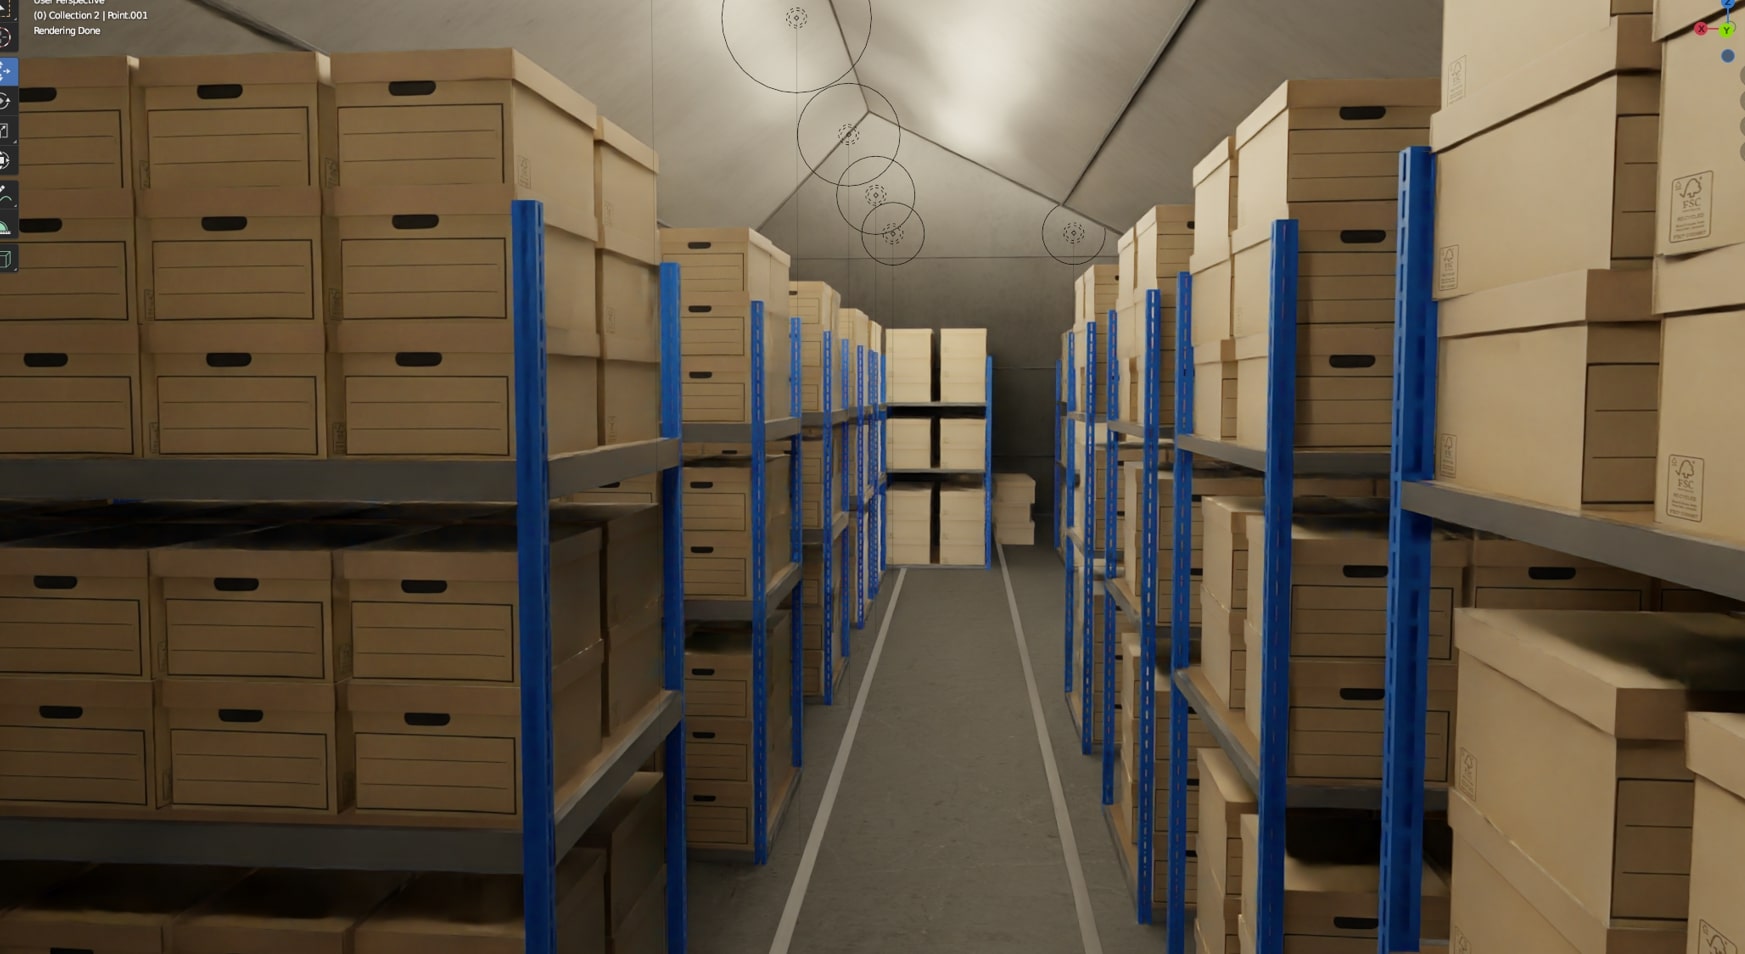
Figures Eleven - Fifteen: As you can see at this point the model is starting to become almost indistinguishable from life. The rooms are extremely realistic and we are nearing completion of the model.
It's worth noting at this point quite how much effort is being put into realism. To emphasize this there was a spoon in one of the rooms which I managed to find the exact retailer of and then recreate a near perfect model of just for something which would probably never be noticed in the final model as can be seen in figures sixteen and seventeen.
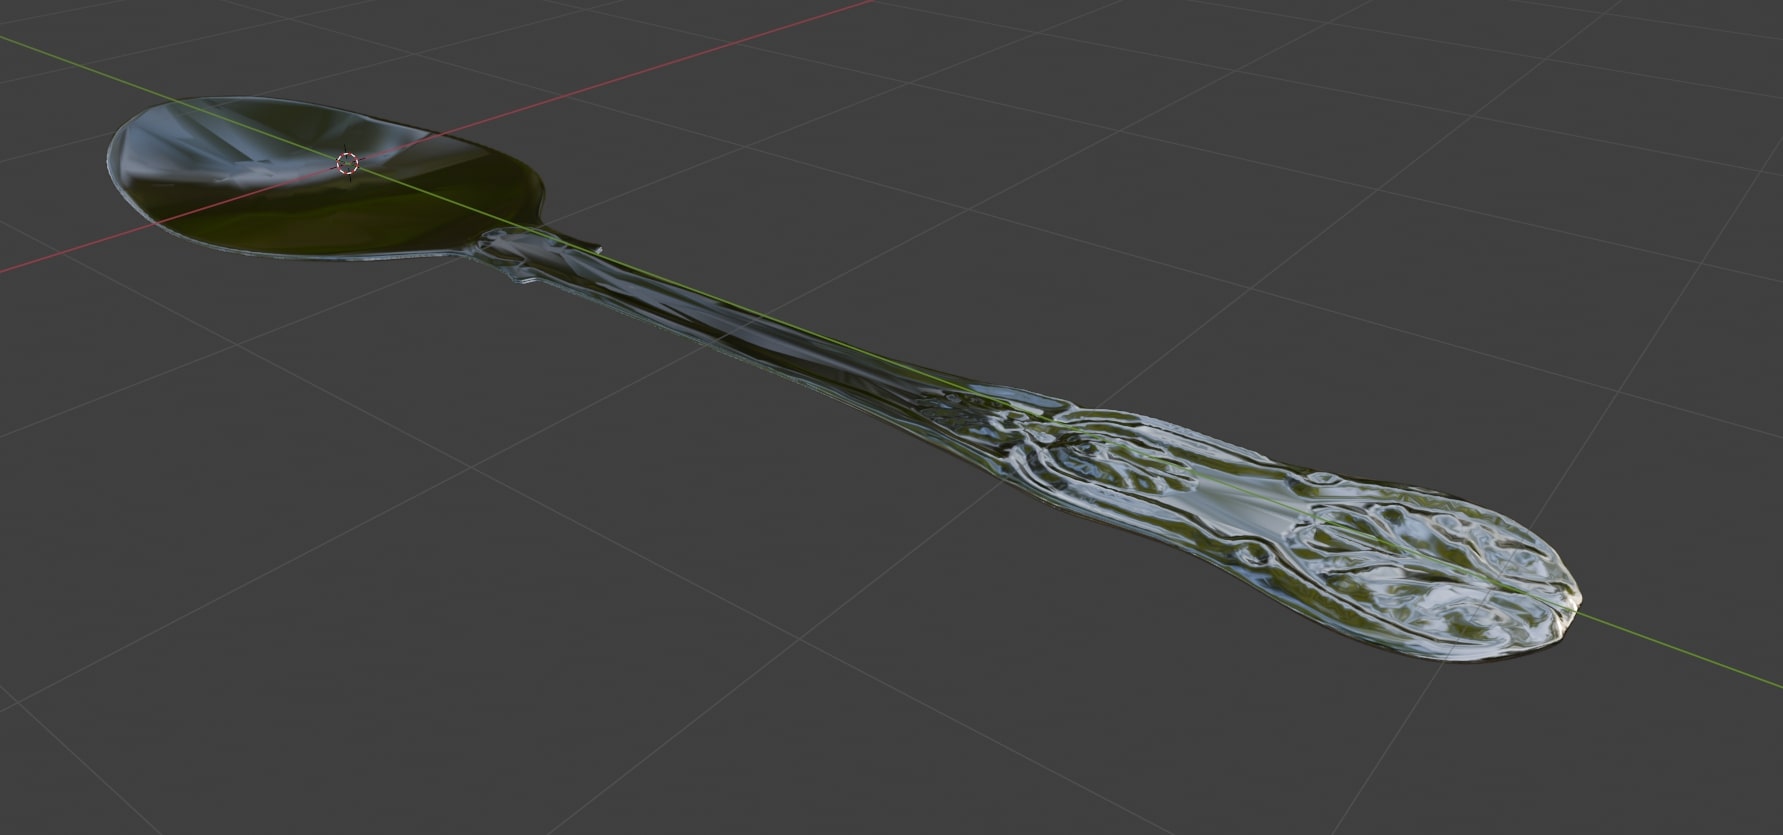
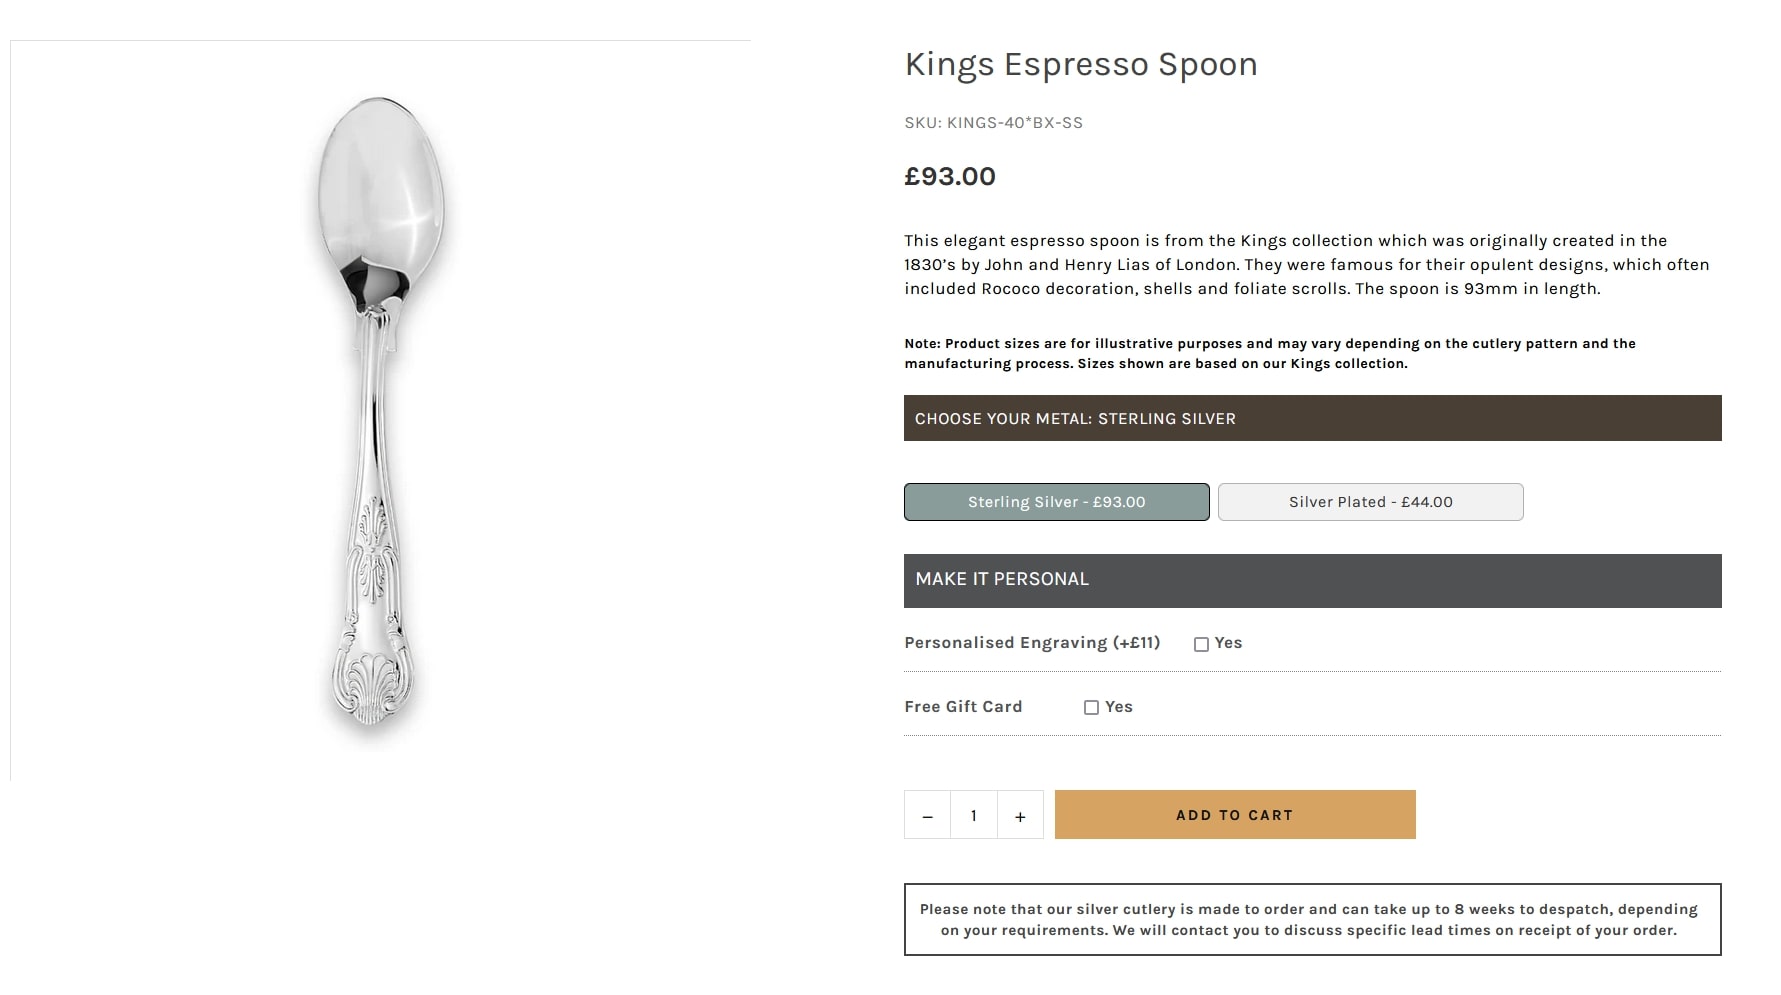
https://www.carrs-silver.co.uk/collections/kings-cutlery/products/kings-espresso-spoon
Figures Sixteen and Seventeen: I managed to, with a lot of research, find the retailer of the spoon in the model (or a retailer that made an identical spoon) and I used this as reference to create an almost perfectly accurate 3d model of it in blender.
We also used emissive cubemap shaders to create realistic interiors even for the rooms we were unable to do as can be seen in figure eighteen. This would've been an issue otherwise as the windows would have just been flat with nothing behind them looking extremely odd. This technique was actually inspired by the Spider-Man game’s cubemaps technique.

At this point we decided the model was good enough to call completed. There's definitely a lot of things I've missed in this writeup which I could have gone into more detail for, but I think the model really just speaks for itself.
A full tour of it can be seen in the video below.
This project was made in collaboration with my friends Dexter Parris and Kyle Heaton.